
Table of Contents
- What You'll Need Before You Start
- How to Hang Storybook Prints Without Damaging Walls
- The Best Adhesive for Art Prints by Weight and Surface
- Renter-Friendly Wall Decor Ideas That Skip the Nails
- How to Arrange Gallery Walls With Storybook Prints
- Safe Removal: Getting Prints Off Without Peeling Paint
- Humidity, Heat, and Print Material: What Changes the Plan
- Frequently Asked Questions
Last Updated: September 22, 2026
What You'll Need Before You Start
You can hang storybook prints without damaging walls using removable adhesive strips, mounting putty, or washi tape. The right choice depends on your wall texture, the weight of your print, and how long you plan to keep it up.
Gather these supplies first:
- Removable adhesive strips (the pull-tab kind)
- Mounting putty or tack for lightweight prints
- Washi tape for temporary displays
- Isopropyl alcohol and a clean cloth
- A pencil and a small level
- A hairdryer for safe removal later
How to Hang Storybook Prints Without Damaging Walls
The safest method uses removable adhesive strips rated for your print's weight. Clean the surface, match the adhesive to your wall texture, then press and hold. Each step below takes under five minutes.
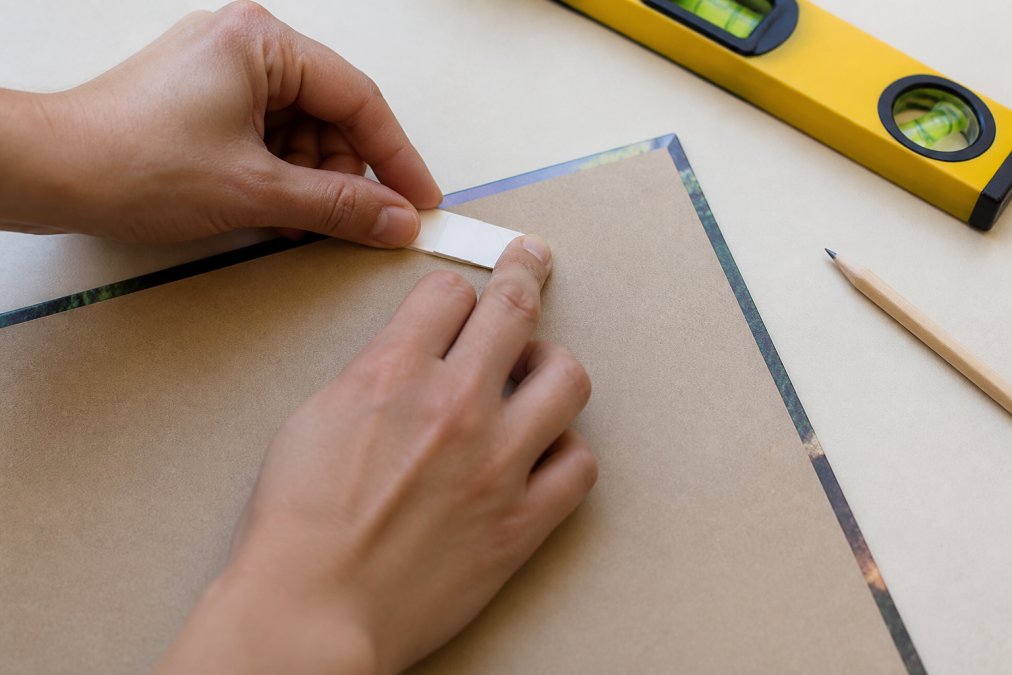
Step 1: Prep the Wall Surface
Surface preparation decides whether your print stays up or falls. Wipe the area with isopropyl alcohol to strip dust, oils, and residue. Let it dry completely. On fresh paint, wait at least a week before applying any adhesive.
Check for these problem spots:
- Loose paint or bubbling
- Damp patches near windows or vents
- Textured finishes that need extra adhesive
Step 2: Match the Adhesive to Your Wall Texture
Smooth drywall and painted surfaces hold adhesive strips well. Textured walls, brick, and wallpaper need different handling. For those surfaces, use mounting putty pressed firmly into the texture, or pick strips rated for rough surfaces.
Step 3: Position and Press Your Print
Hold the print against the wall and mark the top corners lightly with a pencil. Peel the backing, press the strip to the wall for 30 seconds, then press the print onto the strip for another 30 seconds. Wait an hour before letting go completely.
The Best Adhesive for Art Prints by Weight and Surface
The best adhesive for art prints depends on two things: how heavy the print is and what your wall is made of. There is no single winner.
| Print Weight | Wall Type | Best Adhesive | Notes |
|---|---|---|---|
| Under 1 lb | Smooth drywall | Adhesive strips | Easiest clean removal |
| Under 1 lb | Textured or brick | Mounting putty | Press into texture |
| 1-3 lbs | Smooth drywall | Two to three strips | Spread across top edge |
| Any weight | Wallpaper | Washi tape or putty | Strips can lift paper |
| Temporary display | Any | Washi tape | Non-marking, low hold |
Renter-Friendly Wall Decor Ideas That Skip the Nails
Renter-friendly wall decor ideas center on removable adhesives and lightweight materials. You get a finished look without losing your security deposit.
Try these setups:
- Gallery wall with washi tape borders. Frame each print with tape instead of a frame.
- Leaning shelf display. Rest prints on a ledge or bookshelf against the wall.
- Clip strips. Hang a horizontal wire with small clips for rotating art.
- Mounting putty corners. Hold lightweight prints flat with four small putty balls.
- Frame-less display. Mount archival matte prints directly with strips for a clean look.
How to Arrange Gallery Walls With Storybook Prints
Arrange gallery walls by starting with the largest print at the center, then building outward. Keep 2 to 3 inches between frames. This spacing reads as intentional without feeling cramped.
Follow this order:
- Lay all prints on the floor first.
- Pick the largest piece as your anchor.
- Space the rest evenly around it.
- Mark each position with pencil dots.
- Step back and check the balance before sticking.
Safe Removal: Getting Prints Off Without Peeling Paint
Safe removal starts with heat and patience. Warm the adhesive with a hairdryer on low for 20 to 30 seconds. Then pull the tab slowly, straight down along the wall, never outward.
Here is the removal protocol:
- Warm the strip with a hairdryer on low heat
- Hold the wall steady with one hand
- Pull the tab straight down, slowly
- Stop if you feel paint lifting
- Wipe any adhesive residue with isopropyl alcohol
Humidity, Heat, and Print Material: What Changes the Plan
Two variables quietly decide whether your storybook print is still on the wall in six months: the moisture in the air and the material the print is printed on. Most guides treat both as afterthoughts. They are the two things that most often cause a print to drop.
How Humidity and Heat Break the Bond
Pressure-sensitive adhesives are viscoelastic. They need to stay slightly soft to grip, but if they get too soft they flow and creep. Relative humidity above roughly 60 percent and sustained temperatures above about 80°F push many consumer adhesives past that point. The strip does not fail all at once, it slides a millimeter a day until the print is hanging by one corner.
What to do in each problem room:
- Bathrooms and kitchens: assume adhesive life is cut in half. Add a strip, check monthly, and prefer a clip strip on a tension rod or an over-the-door hook over wall adhesive.
- Rooms without air conditioning: apply strips in the coolest part of the day, and expect to re-press them when the season changes.
- Basements and older apartments with damp walls: do not use adhesive at all. A leaning ledge or a freestanding easel avoids the wall entirely.
- Direct sun through a window: the glass acts like a magnifier. Move the print out of the beam or switch to putty, which tolerates heat better than a flat-backed strip.
- Cold rooms and unheated spaces: warm the strip in your hands for 30 seconds before applying. Cold adhesive will not wet out against the wall.
How Print Material Changes the Adhesive You Need
| Print Material | Typical Behavior | Adhesive Approach |
|---|---|---|
| Glossy photo paper | Light, curls at the edges, surface scuffs easily | Two small strips at the top corners plus one at the bottom center; never press adhesive on the image side |
| Matte cardstock | Light to medium, lies flat, edges can lift in humidity | Four small putty balls at the corners, or strips along the top edge |
| Archival matte or fine-art paper | Heavier stock, textured surface, expensive to replace | Strips on a foam-core backing board, then hang the board, keeps adhesive off the paper |
| Canvas print (gallery-wrapped) | Heavier, has depth, back is often hollow | Two strips on the wooden stretcher bar, not on the canvas itself |
| Framed print | Heaviest, rigid, can swing | Strips rated for the frame plus glass weight, or a picture ledge |
| Laminated or UV-coated poster | Very light, slick surface | Strips only, putty will not grip a slick coating |
The U.S. Environmental Protection Agency indoor air quality guidance notes that indoor humidity affects many materials, including adhesives and paper, which is why the same strip that holds for a year in a dry room may fail in a month in a humid one.
Frequently Asked Questions
How do I hang up prints without damaging them?
Keep the adhesive off the printed surface. Apply strips or mounting putty to the back of the frame or the print's border, never across the image. For unframed prints, use a rigid backing like foam board or poster board so the paper doesn't bend or crease. Press gently and avoid repositioning more than once, since repeated peeling stresses the paper. If you frame the print, the glass or acrylic takes the handling instead, which is the safest option for satin and archival matte pieces.
What can I use to hang pictures without damaging walls?
Adhesive strips, mounting putty, and double-sided mounting tape cover most situations. Strips work best on smooth, painted drywall and hold the most weight. Mounting putty suits lightweight prints and textured surfaces because it presses into the bumps. Double-sided tape handles medium weights but can leave residue if left up for years. Test any option on a hidden patch of wall first, then clean the spot with isopropyl alcohol before applying so the adhesive bonds to the paint, not to dust.
Will adhesive strips ruin a poster?
They can if you stick them directly to the printed side or to thin, unbacked paper. Strips pull with steady force, and a lightweight poster will crease or tear before the strip releases. Mount the print on poster board or foam board first, or frame it, then attach the strips to the backing. Removing slowly at a low angle, rather than yanking straight out, also reduces the chance of bending the paper or lifting paint off the wall.
How do you hang art on textured walls without damage?
Textured walls cut an adhesive's contact area, so standard strips often fail. Mounting putty is the better choice because it molds into the bumps and still releases cleanly. Press it firmly for several seconds and give it an hour before adding weight. For heavier prints on heavy texture, use a small nail at a downward angle into a stud or use a picture rail, since no adhesive holds reliably on deep stucco or brick. Always test on an out-of-sight patch first.
Hanging storybook prints without nails is simple once you match the adhesive to your wall and print weight. The tricky part is finding prints worth displaying. Mind Eracing Studio offers character-inspired art from classic tales and fables, with satin and archival matte options that suit any wall. Each piece brings storytelling to life in your space. Get started with Mind Eracing Studio and give your walls a story worth telling.