
Table of Contents
- Why Framing Large Scale Art Costs So Much (and How to Avoid It)
- 1. High-Quality Poster Prints as a Budget-Friendly Base
- 2. DIY Large Picture Frame Construction
- 3. Displaying Large Art Without a Frame
- 4. How to Hang Oversized Art Safely
- 5. Ready-Made and Standard-Size Frame Options
- 6. Poster Hangers and Clip-Based Display Methods
- Cost Comparison by Artwork Size and Method
- Frequently Asked Questions
Last Updated: October 4, 2026
Why Framing Large Scale Art Costs So Much (and How to Avoid It)
When you frame large scale art through custom framing shops, costs typically run into four figures fast. Custom framing shops charge by the linear foot, and a 36x48-inch piece can easily exceed $800 before you add glazing, backing, and hardware. The real cost driver isn't the frame itself, it's the labor, materials, and specialized equipment needed to handle oversized artwork safely. But here's what most people don't realize: you don't need custom framing to display large artwork beautifully. Below, we'll walk you through seven practical methods that keep your budget intact while protecting your investment.
The challenge with oversized pieces is structural. Large artwork bows, warps, and sags without proper support. Humidity fluctuations and weight distribution become real concerns. That's where most budget options fail, they look cheap because they are cheap, and they don't solve the actual problem. The methods we cover here do. They range from simple poster hangers to DIY frame construction, each with specific use cases, real costs, and honest tradeoffs.
1. High-Quality Poster Prints as a Budget-Friendly Base
If your large-scale art doesn't exist yet, start here. Instead of framing an expensive original or having a massive custom print made, commission or purchase a high-quality poster print at the size you need. This reframes the entire problem: you're no longer trying to frame something oversized and delicate. You're displaying a print built for display.

Mind Eracing Studio's satin and archival matte posters start at $16.27 and come in 18 sizes with horizontal, vertical, and square options. The satin finish deepens color and adds a luminous quality, while archival matte offers a museum-quality, non-reflective appearance. Both use heavyweight paper, 210 gsm (satin) and 230 gsm (archival matte), that resists bowing and holds detail over time. For large-scale art display, this matters. A flimsy poster will sag in its frame. These won't.
The real advantage: you control the dimensions. Need a 24x36-inch print? You get exactly that, already optimized for standard frame sizes. No custom printing markup. No waiting weeks for a print shop to produce something. Order, receive, and display. For collectors seeking character-inspired art from classic tales, options like Monsters of Willow or female architecture deliver the visual impact of custom framing at a fraction of the cost.
2. DIY Large Picture Frame Construction
Building your own frame eliminates the labor cost entirely. A custom framing shop charges $50-150 per linear foot just for assembly and finishing. A DIY frame for a 40x60-inch piece might cost $80-200 in materials and 4-6 hours of work. You're trading time for money, a fair deal if you have the skills and tools.
Materials and Tools You'll Need
For a basic DIY frame, gather these materials:
- Frame molding (wood or MDF): Choose a profile that appeals to you. MDF is cheaper and stable; wood offers more character but requires finishing. Budget $2-6 per linear foot.
- Backing board: 1/4-inch MDF or foam core ($15-30 for a large sheet you can cut down)
- Mat board (optional): Adds depth and protects the artwork from glass contact ($10-20)
- Glazing: Acrylic sheet ($20-50) or glass ($30-80). Acrylic is lighter for oversized pieces; glass is more archival.
- Wood glue, corner clamps, nails or screws, sandpaper, wood stain or paint
- Hanging hardware: D-rings, wire, or French cleats ($10-20)
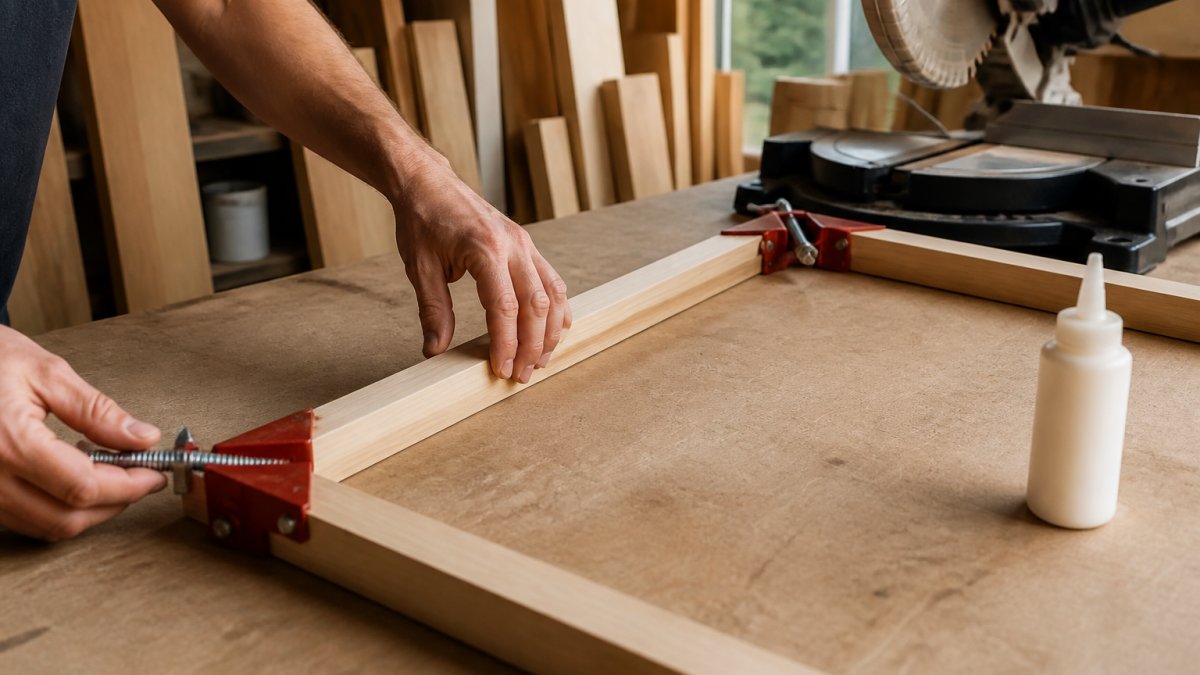
Tools required: miter saw or hand miter box, clamps, drill, staple gun, measuring tape, level. If you don't own these, factor in rental costs or borrow from a maker space.
Step-by-Step Frame Assembly
Step 1: Cut your molding to size. Measure your artwork carefully. For a 36x48-inch piece, you'll need four pieces of molding cut at 45-degree angles. Use a miter saw for clean, precise cuts. This is the most critical step, poor cuts mean gaps and misalignment.
Step 2: Assemble the frame. Apply wood glue to each mitered corner, then clamp or nail them together. Use corner clamps to hold everything square while the glue dries (2-4 hours). Check for square using a measuring tape, opposite corners should measure the same distance.
Step 3: Prepare the artwork and backing. Mount your poster or print onto the backing board using dry mount, spray adhesive, or corner tabs. Avoid wet mounting (wet glue) for large pieces, it causes warping.
Step 4: Add glazing if desired. Cut acrylic or glass to size and secure it in a rabbet (groove) cut into the back of the molding, or use glazing points to hold it in place. For oversized artwork, acrylic is safer.
Step 5: Assemble the package. Place the glazing, mat board (if using), artwork, and backing into the frame. Secure the backing with tabs or points. Ensure everything is flat and centered.
Step 6: Hang securely. For pieces over 30 pounds, use a French cleat or heavy-duty D-rings with wire rated for the weight. Oversized artwork needs proper support to prevent sagging and wall damage.
3. Displaying Large Art Without a Frame
Not every large-scale artwork needs a frame. Some of the most striking displays skip framing entirely. This works best for posters, prints, and flexible artwork that doesn't require physical protection.
Canvas stretching is one option. If you have a poster or print, mount it onto wooden stretcher bars (like a canvas painting). The tension holds it flat, and the depth adds visual interest.
Mounting directly to the wall is another approach. Use mounting tabs, adhesive strips, or small nails at the corners to hold the print flat against the wall. This works for archival matte prints and posters that won't shift or sag. It's the simplest, cheapest method: your only cost is the print itself and minimal hardware.
Leaning large artwork against the wall (without hanging) creates a casual, curated gallery feel. This is rent-friendly, no wall damage, and lets you rotate pieces seasonally. The print needs to be rigid enough not to fold. Archival matte posters from Mind Eracing Studio work well here.
4. How to Hang Oversized Art Safely
Weight is the enemy of oversized artwork. A 36x48-inch piece with glass can weigh 60-80 pounds. Standard picture hooks won't hold it. Improper installation leads to falls, wall damage, and ruined artwork.
Satin and Archival Matte Posters →
Use a French cleat for any piece over 25 pounds. A French cleat is two pieces of wood cut at 45-degree angles and attached to the back of the frame and the wall. It distributes weight across a large area and is nearly impossible to pull down accidentally. Cost: $5-10 in wood and hardware. Installation takes 15 minutes.
Measure twice before drilling. Mark the studs in your wall using a stud finder. Large artwork should always be anchored into studs, not drywall alone. Drywall anchors fail under sustained weight. If studs aren't positioned where you want the piece, use heavy-duty toggle bolts rated for the weight you're hanging.
For pieces over 50 pounds, consider a wall-mounted shelf or ledge system instead of hanging. The artwork sits on the shelf, supported from below rather than suspended. This eliminates the risk of the frame pulling away from the wall.
Check the frame regularly. Over months and years, wood frames shift slightly, and hardware can loosen. A quick inspection every six months catches problems before they become dangerous.
5. Ready-Made and Standard-Size Frame Options
Ready-made frames come in standard sizes: 8x10, 11x14, 16x20, 24x36, and a few others. They're cheap ($15-50) because manufacturers produce them in volume. The tradeoff: your artwork must fit the frame, not the other way around.
This works if you're flexible on dimensions. A 24x36-inch print fits perfectly into a standard frame. A 25x37-inch print doesn't. You'd need to trim or mat it, adding steps and potential damage to the artwork.
Standard frames also limit aesthetic choices. You get basic wood finishes, basic metal finishes, and basic colors. If you want something distinctive, a specific wood tone, a particular molding profile, or an unusual color, ready-made frames disappoint.
That said, for straightforward display of large posters or prints, ready-made frames are functional and affordable. They're widely available online and in retail stores. Assembly is minimal: drop in the print, add backing, and hang.
6. Poster Hangers and Clip-Based Display Methods
Poster hangers, wooden or metal bars that grip the top and bottom of a print, offer a clean, gallery-like look without framing. They're common in museums and design studios. Cost: $10-30 for a quality hanger. The print hangs freely, and the hanger itself becomes part of the aesthetic.
Magnetic frames and clip systems work similarly. Metal frames with magnetic edges hold the print in place without adhesive or mounting. Clips clamp the edges of the poster, creating tension that keeps it flat. Both methods are reversible, no damage to the print, and you can swap artwork in seconds.
These methods work best for prints and posters that are already flat and rigid. Delicate or valuable artwork shouldn't be clamped or magnetically held; the pressure can damage edges or cause creasing.
For large-scale artwork, poster hangers and clips become less practical. A 40x60-inch print is heavy and unwieldy. The hanger needs to be sturdy enough to support the weight without bowing. This pushes costs up ($40-80 for heavy-duty hangers) and reduces the aesthetic appeal, the hardware becomes more visible and prominent.
Cost Comparison by Artwork Size and Method
| Method | 24x36 Artwork | 36x48 Artwork | 40x60 Artwork | Setup Time | Reversible |
|---|---|---|---|---|---|
| High-quality poster print only | $16.27 | $16.27 | $16.27 | 5 min | Yes |
| Poster hanger or clips | $20-40 | $30-60 | $50-100 | 10 min | Yes |
| DIY frame (wood molding) | $60-120 | $100-180 | $150-250 | 4-6 hours | No |
| Ready-made frame | $30-60 | $50-100 | $80-150 | 10 min | No |
| Canvas stretcher mount | $40-80 | $60-120 | $100-160 | 20 min | No |
| Direct wall mount (no frame) | $5-15 | $5-15 | $5-15 | 15 min | Yes |
| Custom framing (professional) | $200-400 | $400-800 | $600-1,200+ | N/A | No |
The cheapest option is always the poster print itself, $16.27 from Mind Eracing Studio. If you want to display it without framing, add $5-15 in basic mounting hardware. If you want a frame, DIY construction costs $100-250 in materials and 4-6 hours of work. Ready-made frames cost $50-150 and take 10 minutes to assemble. Poster hangers and clips fall in the middle at $30-100 and offer reversibility.
Custom framing is the expensive option because you're paying for design consultation, specialized labor, and premium materials. For everything else, the methods above deliver excellent results at a fraction of the cost.
Displaying large-scale artwork doesn't require a custom framing budget. High-quality posters, DIY frame construction, and creative mounting methods give you gallery-quality results for $20-250 instead of $400-1,200. Mind Eracing Studio's satin and archival matte posters start at $16.27 and come in 18 sizes with options for horizontal, vertical, and square layouts. Add a simple frame, poster hanger, or mounting hardware, and you have a finished display ready for your wall. Start with the poster itself, the quality of the print is what matters most.
Frequently Asked Questions
How can you frame large art cheaply?
Start with high-quality poster prints from sources like Mind Eracing Studio ($16.27 per print) instead of original artwork, which eliminates custom framing costs. Build a DIY frame using MDF board and basic molding from hardware stores, or skip framing entirely with poster hangers and clip-based display methods. For 24x36 inch artwork, DIY framing typically costs $30-$60 in materials versus $200-$400 for custom framing.
What are affordable alternatives to framing large-scale art?
Poster hangers (magnetic or wooden clips) cost $10-$25 and hold artwork flat without a frame. These methods work especially well for large-scale prints and posters.
Can you make a DIY frame for oversized art?
Yes. Use MDF board for backing, wood molding strips for the frame edge, wood glue, a miter saw for 45-degree cuts, and basic hardware. For a 24x36 inch frame, expect to spend $40-$60 on materials. The key is supporting oversized artwork with sturdy backing to prevent bowing.
How do you hang large art without a frame?
Poster hangers grip the top and bottom edges of your print, keeping it flat and taut. For rent-friendly options, adhesive strips and damage-minimizing hanging systems avoid wall damage. These methods work best with high-quality prints like Mind Eracing Studio's satin and archival matte options, which are durable enough for frameless display.